Showing posts with label Rules Review. Show all posts

Sunday, 14 April 2019

Mortal Gods - First Playthrough


So my mate, Alan, has been waiting with fevered anticipation for this to arrive and so when the postie delivered Mortal Gods (originally by a company called "War Banner" but who have now had to change their name to "Dark Peak Games" and then to "Footsore Miniatures and Games" due to having received cease and desist letters from GW and Peak Games - see the announcement here) to him a couple of weeks ago he has been been busy as the proverbial painting up the core set figures. And Alan being Alan, had also got the Spartan and Athenian boxed sets as well as a number of "extra" models so he has gone pretty well all in on the game!

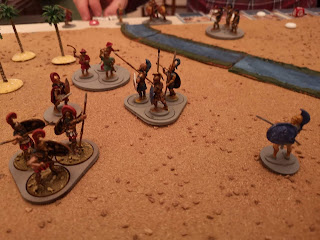
So when I went up to his house last week he had a couple of warbands pretty well all painted and ready to go

All set up and ready for action

Each player creates a Warband with each individual warrior, group of warriors and hero costing a number of points with 300 points being suggested for a reasonable sized game. Each Warband (or "Lochos" to give it it's proper title) is led by a "Lochagos". At least half of the warband's points must be spent on rank and file troops (called "Companions") and for every 125 points spent on the warband, the Lochos can include an additional hero.

The Athenian Lochagos - Andronikos the Defender

Different types of warrior are represented - from your skirmishing troops to your classic Hoplite Warrior and each unit will be classed as either Light, Medium or Heavy representing the armour that those warriors wore.

Each part of the warband will have a stat card showing the various attributes that you need to use throughout the game - movement, attack value, "active" defense value, resistance, courage and activations. Some units may also have "gifts" bestowed on from the Gods - special abilities that can perhaps boost movement or combat or courage.

Stat Card for an Athenian "Peripoloi" unit. 

The Brave Defenders of Democracy - the Athenians

The Tyrannical Spartans 

The system is activation based. Rank and file units will normally only have 1 activation they can do per game turn with heroes having 2 or more. At the start of a game turn each unit is allocated a token per activation it can do (in the core set you get white pebbles for rank and file and black pebbles for heroes) and these are put in a draw bag and then the player draws a pebble from the bag. If it's white  pebble then they can take an action with one of their rank and file units and if it is a black pebble they can take an action with one of their heroes. In the game that we played each of heroes had a special ability whereby they could use their activation to order another of their units within 6" of them, even if that unit had already activated that turn - effectively giving the unit a "free action" - this can come in very handy!

With an activation a unit can either move (Light troops can move up to 8 inches, Medium troops up to 7 inches and Heavy troops up to 6 inches), carry out a charge attack whereby the unit can move it's normal movement plus D6 inches - beware, however, if you roll a "1" on the D6 then your unit is deemed to have "stumbled" and won't then charge! Missile troops can carry out a ranged attack. If a unit has the "form up" gift then it can join up with 2 other similar stands of figures to form a phalanx.(this didn't come up in our game so I don't know what the benefits of forming a phalanx are except to assume that it will be pretty hard in combat! - I'll investigate this in more detail the next time we play!).

Combat involves rolling some custom dice - these are emblazoned with swords, double swords, shield or a "Pegasus" symbol. When attacking, a unit rolls the number of dice as shown on their stat card plus any other bonus dice that they may qualify for through their gifts or some other event. Every sword symbol rolled counts as a success and if a Pegasus symbol is rolled then this may also count as a success if the attack stat on the card has a blue Pegasus symbol next to it. 

That's a lot of swords!!!

Before any attack dice are rolled, the defending unit will need to declare if it is "actively defending". If that unit has not yet taken an activation for the turn then it can choose to actively defend (and thus use up it's activation for the turn) thus allowing it to roll the number of defense dice shown on it's stat card. If it chooses not to actively defend - thus hoping to keep it's activation to do something else then it will need to make a courage check - the unit will roll a number of dice as shown on the Courage Stat on it's card. If it rolls a sword symbol - it passes. (I will need to check this time next time I see the rules as it didn't seem very onerous a check - that is until my Lochagos did a courage check and just managed to roll 1 sword on 4 dice!). If the check is passed then the unit will roll defense dice equivalent to it's armour rating, 2 for Heavy troops, 1 for Medium troops and none for Lights!

For every Shield symbol rolled (and if allowed by the Defense Stat - Pegasus Symbols) will cancel one of the successes. If there are still 1 or more successes remaining then the attacker will roll a number of dice equivalent to the uncancelled successes and again each sword symbol will this time score a wound on the defending unit (as marked by the red dice in the Peripoloi picture above). Once a model takes wounds equal to it's resistance value it is removed from play. If damage is scored then the defending unit will be forced to retreat 1 or 2 inches back depending on how much damage is scored. If no successes are scored then the attacking unit will retire an inch.

If a stat symbol has a "Red Pegasus" symbol next to it then that will cause a penalty to the particular unit when using that stat if a Pegasus symbol is rolled. Again note the Red Pegasus symbol next to the defence stat on the Peripoloi card.

In addition to all of the activation peebles placed in the bag are placed 3 red "Omen" pebbles. If one of these peebles is drawn then the top card is drawn from the "Omen"deck of 30 cards which is shuffled at the start of the game. This card may bring a boon or curse to the unit or it may be an event that affects one side or the other or perhaps the whole battlefield. Some may only last for that turn, others may stay in force for the rest of the game. Who knows what the Gods will bestow upon the combatants!!

When the 3rd red Omen pebble is drawn the turn ends and all of the activation pebbles returned to the bag and a new turn starts.

The game is scenario driven with a dozen suggested scenarios given in the Rules - setting out the objectives, length of the game and any other special rules. The recommended play area is a 3' x 3' table although in our game we just played down the length of Alan's table and it seemed to work out fine.
Note the cool measuring stick!

So being our first try out we just went for a simple attrition scenario - that is - kill as many of the other guys as you can and the player with the highest number of victory points scored wins!

The Athenians deployed ready for battle!!

The Spartans line up nervously at the other side of the battlefield wondering where Gerard Butler has disappeared off too!!


The Spartans advance

The Athenians stride out to meet them. Unfortunately the turn ended before I could get my last 2 warriors (the 2 guys at the back) to activate.

Andronikos the Defender urges his men forward!

First Contact - The Athenian Marines (I can't remember what Greek name they have!) are assaulted by the Spartan Krypteia - top dogs in the Spartan Army apparently!

The Marine take some wounds but not enough to remove a model. They do a strategic withdrawal.

The Spartan Krypteia being so distracted by the Marines fail to see the danger on their flank as Andronikos charges in (no flanking rules in this game as far as I could see anyway)
As seen from the Spartan side

Having already removed one model from the Krypteia, Andronikos gets another activation and charges in scoring 8 successes!!

The Krypteia only cancel 2 of those successes so Andronikas rolls for wounds and scores 6 wounds!! Dead Spartans!!

The Athenian Archers open fire on the lone Spartan Hoplite who dies when the sky is filled with arrows.

The opposing Hoplites clash shields! 

Then the Spartan Lochagos decides, eventually, to get in on the act

And is forced to retire!!

3 units against 1?? That's hardly fair. Now the Spartan light troops get involved.


The Athenian Hoplite counter attack on the Spartan Light troops results in 2 models being removed. Another Spartan Hoplite Warrior decides he needs to help out his comrades.

The Spartan light troops - egged on by the Spartan second in Command (the Promachos) face up against the Athenian light troops.

Andronikos arrives to take some pressure off the Athenian Hoplites and crashes in to the Spartans

The Spartan Hoplites routed! The Athenian Hoplites hanging on, down to their last model (who had one wound left!)

The battlefield at the end of the final turn (turn 6).

I'll not embarrass Alan and announce the score but let's just say that the Gods were definitely smiling on the Athenians who gave their Spartan foes a damned good thrashing.

So a good fun game to begin with. Definitely a few points that we missed (critical hits being one of them) so hopefully in our next game we can tidy up on those points and if Alan keeps painting at the speed he has been doing then we might even see enough troops being available to form Phalanxes so it will be interesting to see what that brings to the battlefield.


Sunday, 24 March 2019

Rangers of Shadowdeep - Rules Review and First Playthrough


So there has been a lot of chatter on the world wide web about these rules, being the latest creation from the man behind the Frostgrave rules, Joe McCullough, and having listened to his interview with Henry Hyde in his Battlechat and the Meeples Guys talking about it in Episode 262 it sounded like the sort of game that the THAGGers would be interested in.

So a quick visit to Drivethru RPG and ordering the hardback book with the pdf file option the tome arrived about a week later. After a quick read through the THAGGers agreed that we would role up a Ranger character and have a bash at the introductory Mission in the book - "The Missing".

Rangers is what you would call a "RPG lite" rules system, the player creates a Ranger who has a initial stat line consisting of movement, fight, shoot, armour, will and health. There are also a list of Heroic Abilities and spells that the Ranger can select and a list of inherent skills. By allocating build points between the stat line, abilities/ spells and skills this is what makes each Ranger different as it is up to the Player to decide where to spend the 10 build points that each starting character has available.

By completing scenarios and missions the Ranger will accumulate experience which can then be spent when the Ranger reaches a new level allowing them, depending on the level that has been reached, to increase a stat, or acquire a new ability/ spell and so on.

A Ranger never likes to venture out alone so depending on the number of Players taking part, each Ranger can recruit a number of Companions to their cause and the rules have a list of the different types of Companion that can be hired. Again, if the Ranger has Build Points available these can be used to increase the number of recruitment points that can be spent to recruit Companions.

Reg the Ranger and his devoted Companion, Burdie


The game turn consists of 4 phases, the Ranger Phase, the Creature Phase, the Companion Phase and the Event Phase. During the Ranger Phase, the Ranger with the highest will stat activates first and has up to 2 actions available, one action can be any action the figure could perform, for example, movement, fight, shoot and if a second action is taken then it has to be a move action, although the character can decide in which order to take the actions, so they can, for example, move and then shoot, or shoot and then move. Also, any of the Ranger's Companions that start the turn within 3" of the Ranger can activate as well.

If a figure moves into base contact with an enemy then they have to spend an action to fight the enemy. Combat is based on a d20 roll, the character and the enemy each roll a d20 and add their fight stat for close combat. There may be additional factors added to the roll depending on supporting characters, cover, magic weapons and so on. The combatant that rolls the highest score then deducts the opponent's armour value from their score and if the difference is a 1 or more then that is the amount of damage that the opponent suffers. When health is reduced to 0 then if it is a creature it is treated as being killed and the model is removed. If it is a character, then whilst the model is still removed from the table at the end of the scenario a d20 roll is made on a table to determine if the character has actually survived the encounter or if they taken some form of permanent damage or if indeed they had been killed in the scenario.

The clever mechanic in the rules takes place in the Creature Phase. The creatures are not controlled by a player but rather a simple flowchart determines how the baddies will react during their turn. I found this was a really simple but effective method of controlling the bad guys and certainly during our games there were no quibbles raised on how this operated. Basically if a baddie can see a character it will move towards it and try and engage them in combat. If it has a missile weapon it will shoot at the character., and if the creature doesn't have anyone in line of sight it will move towards the "target point" as described in the scenario rules or move in a randomly determined direction.

In the Companion Phase, the Ranger's companions will activate and perform the same type of actions as a Ranger can (if they had not activated during the Ranger Phase). 

Finally, there is an Event Phase. In the scenario instructions you will be told to create an event deck built up of a certain number of playing cards and one of these cards may be drawn every turn or alternate turns, depending on what the instructions say. A chart is consulted and depending on what card is drawn the result is implemented. 

Then you start a new turn. 

Each scenario will last a set number of turns at the end of which the Rangers who have not died during the scenario receive experience calculated by the number of creatures killed and scenario objectives achieved. This is a co-operative games so all of the Rangers will receive the same number of experience points regardless of who actually did the killing or found the clues and so on and as mentioned above the experience earned can be used to increase the Rangers's attributes. Even Companions can improve their attributes by earning "Progression Points" although this is at a much slower rate than the Rangers (can't have the minions becoming better than the boss!!).

So having rolled up our characters, Roo, Neil, Stevo and myself started the first scenario of the first mission - "The Deserted Village".

The Ranger, Aventine, has gone missing in the Shadow Deep. Our party's job was to find him or take news back to the King as to what became of him......

The Heroes arrive in the centre of the village when suddenly they see the horrific sight of corpses rising from the ground.


The Dead  Arise!!

Reg's Bow twanged as he looked to fell one of the foul creatures -

Looks like it is going to be one of those games.

The scenario instructions called for "clue" tokens to located around the table 

Burdie spots a clue (token courtesy of file download from RCNavratil on Boardgame geek)

In the meantime Neil's Ranger, Wolfrick, and his hound, Tyr-


discover a body - 

A roll on the clue table reveals that the body is that of  the Ranger, Aventine. Taking the fallen Ranger's sword, Wolfrick swears to return it to the King (although he does get to use if for the rest of the Mission giving him a +1 to his combat rolls).


On the other side of the village, Stevo's Ranger, JimLad, was assaulted on 2 sides by zombies. The end of the turn and the event card was drawn -

And JimLad was left frozen in terror! He would not be able to activate next turn. 
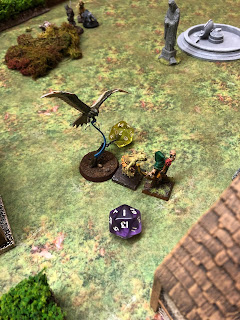
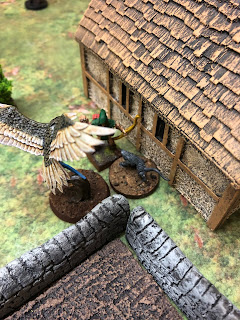
(Editorial note - as Stevo hadn't bothered to bring a painted figure along to the game - his is the unpainted Empire figure with a bow in the second picture above - we decided that this was a poor show on his part so his figure was substituted with one of my D & D prepaints)

Roo's Ranger, The Great Garbanzo (yes it is a goblin - there was nothing in the rules that we could see that stopped Roo from taking a Goblin as a Ranger) with his Squig Companion Ketchops, rushed towards one of the buildings where he thought he could hear a voice.


Reg, having failed to take down a zombie with his bow, moves in to combat with the foul creature, confident that his years of training would lead to a swift dispatch of the foe....

Oh bugger! 

With Reg's armour being 11, the Zombie mangles him for 3 health points.

Ketchops, leaves his master and rushes to JimLad's aid -

Nom Nom Nom goes the Squig! Squelch goes the Zombie

Garbanzo's instincts prove right and entering the building he encounters the Village Elder Carl -

Saved by a Goblin! Well beggars can't be choosers.....

Having eventually dispatched the Zombie with Burdie's assistance, Reg hears a squeak from the building behind him -


This time Reg takes 8 points of damage!!! Back to Sword Fighting Academy for you Reg (if you survive)

Again, Burdie swoops in to rescue the hapless Ranger!

Garbanzo clashes with another Zombie with Ketchops rushing to his master's aid.

The play of an event card at the end of each turn, meant that Zombies kept popping up -


And Garbanzo wasn't always getting the rolls his way

Roo insisted I put this picture in though!

Carl gives thanks for his salvation.


As dawn broke, the attack on the Rangers ceased and they paused to patch up their wounds and take stock. 

Wolfrick's hound had fallen in the combat but fortunately was not killed although he did suffer a crushed paw which would give -1 to his movement allowance. Although Reg had failed to identify a set of strange tracks, JimLad was able to determine that the villagers had been attacked by poisonous spiders, the venom of which had led to some of the poor unfortunate souls being turned into Zombies. Carl was also able to tell the party that he believed some of the village folk had been dragged away by the fearsome spiders. The Party knew they would have to seek out the Spiders' nest and destroy it before the foul spawn could spread their evil any further. 

So a quick reset of the table - this time only using a 2 1/2 ft x 2 1/2 ft layout as opposed to a 3ft x 3ft for the first scenario - Joe who uses 2 1/2 ft x 2 1/2 ft mats???!!!!


"The Infected Trees"!

The hapless Reg is attacked by a Spider. Fortunately, he has learnt his lesson from the debacle in the village and slays the arachnid

Wolfrick, having rescued Carl's twin brother, Frank, from a spider cocoon, moves to intercept some spiders

Reg and Burdie tag team another spider. Unfortunately the cocoon contained only the remains of an unfortunate villager.

Wolfrick, equipped with Aventine's magic sword about to dispatch another spider

JimLad and Hound Dog, gang up against another poor spider with Ketchops waiting to bite, if JimLad misses.

Garbanzo sets fire to one of the spider nest trees

Whilst JimLad gets caught up in a web!

Although the scenario lasted 10 turns, it was played through very quickly. Even with the discovery of another spider nest tree at the end of the 9th turn didn't prevent the party quickly setting fire to it and vanquishing the spider foes.

With the spider den in flames, the Party returned back to the King in his capital, Tallis, their exploits gaining them enough experience to go up a level and increase some of their skills.

Thoughts on the game?

We all enjoyed it! 

The rules were simple but not simplistic and the use of build points allows the players to give their Rangers enough of a different character from the others. The AI system worked very well and was easy to determine what the baddies would do from turn to turn. Having played Frostgrave (admittedly sometime ago) it wasn't too difficult to get used to the combat system mechanic and after the first couple of turns the only reason to look at the rule book was to check the scenario instructions and consult the event table.

The two introductory scenarios played completely differently, with the first one the better of the 2. We all thought that the second one, despite it's length, didn't prove much of a challenge. We did feel that the fact that you only drew an event card at the end of each odd numbered turn reduced the tension a bit although it did see JimLad getting caught up in a web for a turn.

The fact that the experience gained from a mission is available to all encourages the co-operative nature of the game which was just as well from Reg's point of view given he couldn't hit a thing in the first scenario. The scenarios we played didn't really call upon the Rangers to make too many skill rolls but again that looks like it will change as we progress through the scenarios.

I kept forgetting about the Heroic Abilities that the Ranger has - although they are useable only once in a scenario, if I had maybe remembered about my Deadly Shot ability Reg might not have had to worry about getting into combat given his poor swordwork. 

The Rule book contains 3 missions , the one that we played through, "The Beacon Tower" and "The Descent into Darkness" and also "The Burning Light" Campaign. The difficulty level does seem to rack up somewhat in these so it will be interesting to see how the Party fares in these. 

Already the player community that has formed has started to produce their own missions and campaigns which are available on Boardgamegeek or on the Rangers Facebook group (it's a closed group so you do have to apply to join) . The rules also contain a bestiary for all of the baddies that you are likely to encounter and the campaign supplements that Joe has released Blood Moon and Temple of Madness provide more beasties and more Companions choices.

Any criticisms? Not really. The rule book does state that most of the scenarios will be played out on a 2 1/2 ft x 2 1/2 ft table which seemed an odd size choice given  game mats are usually available in 2 ft x 2 ft or 3 ft x 3 ft  but that really is a minor gripe. And the game will only cope with a maximum of 4 players but again that is not really a criticism.

So the THAGGers will be playing it again and next time we will see if Reg has learnt how to swing a sword properly................