I do like Space Ships.
And I have always liked games involving Space Ships.
So when
PSC Games (the board game side of The Plastic Soldier Company Ltd) announced last year that they were to do a Kickstarter to produce a Starship game by Richard Borg based on the Commands & Colors mechanics and called
Red Alert then it was a bit of a no-brainer as far as I was concerned.
And give PSC their due. When the Kickstarter finished, they were estimating delivery of the game for March 2019 and as announced in my post
here the game duly arrived on time.
If you have played any of the Command & Colors games then the mechanics of Red Alert will be familiar to you. The scenario will determine which player will go first and the game is an IGO-UGO system.
Each player has a hand of "Command Cards" with which to order their units. The board is split in to 3 sectors, left, centre and right. One card is played each turn and this will determine which sector of the board will be activated or which category of unit is activated with the maximum number of units that can be activated either stated on the card or limited by the players "Command Rating".
The units in this game are split into 3 classes, Capital, Strike and Fighter with each class also sub-divided into standard or heavy units (with 3 models representing a standard unit and 4 units representing a heavy unit). Any units activated can move up to a set number of hexes for the particular type of ship, for example, fighters will normally move up to 4 hexes whereas your flagship will only move 1 hex. Terrain can play a part in the game in the form of Asteroid fields and Planets, slowing a unit's movement and in the case of an Asteroid Field possibly causing damage to the unit.
Activated units once moved can then engage in combat, either ranged or close quarters, although it should be noted that a unit does not need to move to engage in combat. The unit simply has to be activated that turn.
Also available to the players is a deck of "Combat Cards" which can be played during combat to gain a tactical advantage. However, the play of these cards cost a number of "Star Tokens". At the start of each scenario the player will have a specified number of these tokens which are depleted as the combat cards are played. To replenish these tokens the player has the option of taking 1 or 2 tokens at the end of their turn (if the player wishes to draw a new combat card at the end of their turn then they only draw 1 token or they can forfeit the drawing of a combat card and draw 2 tokens instead). Also, during a combat roll the player will receive a star token for every star symbol rolled on the dice.
When units enter into a combat (ranged or close quarters) the attacking player will roll the designated number of dice for the attacking unit and for every class symbol of the defending unit type rolled (purple squares for Capital, Blue triangle for Strike and Green circle for Fighter) or if a Blast symbol is rolled then a model from the defending unit is removed. However, heavier ships will be able to ignore some hits inflicted by smaller classes, for example, Capital ships ignore the first two blasts symbols rolled by an attacking Fighter unit and Fighters will ignore the first blast symbol rolled against it by an attacking Capital ship.
Once all the models in a unit are removed then the victor will receive that unit's counter which will be worth a number victory points and the winning of the scenario are determined either by the number of victory points accrued or enemy units destroyed.
If the attacking player rolls a "Red Alert" symbol on the dice then, similar to the "Flag" symbol in Ancients, the defending unit may have to retire 2 hexes. If a hit is rolled in the same roll then the unit must retire (unless it is adjacent to it's Flagship unit). If no hit is rolled then the unit can choose whether to retire. If 2 Red Alerts are rolled then the defending unit will have to retire. Units can retire through hexes occupied by enemy units (it is space after all) but at the risk of taking more damage from a free roll for the enemy unit. A Red Alert token is placed with the unit and whilst it remains with the unit it cannot move forward and if it engages with an enemy unit it loses an attack dice. Star tokens require to be spent to remove such a token.
If the defending unit doesn't retire then, if it is a close quarters combat and if the player has 2 star tokens available, then they can "battle back" and roll to try and score hits on the attacking unit and again if star tokens available may play a combat card to support that combat.
There are 10 scenarios provided in the core game and other scenarios are provided in the "Escalation Packs" that are available separately. These scenarios will either list the ships available to a Player or the Players may require to draw a random "Task Force" card which will determine the ships available to them.
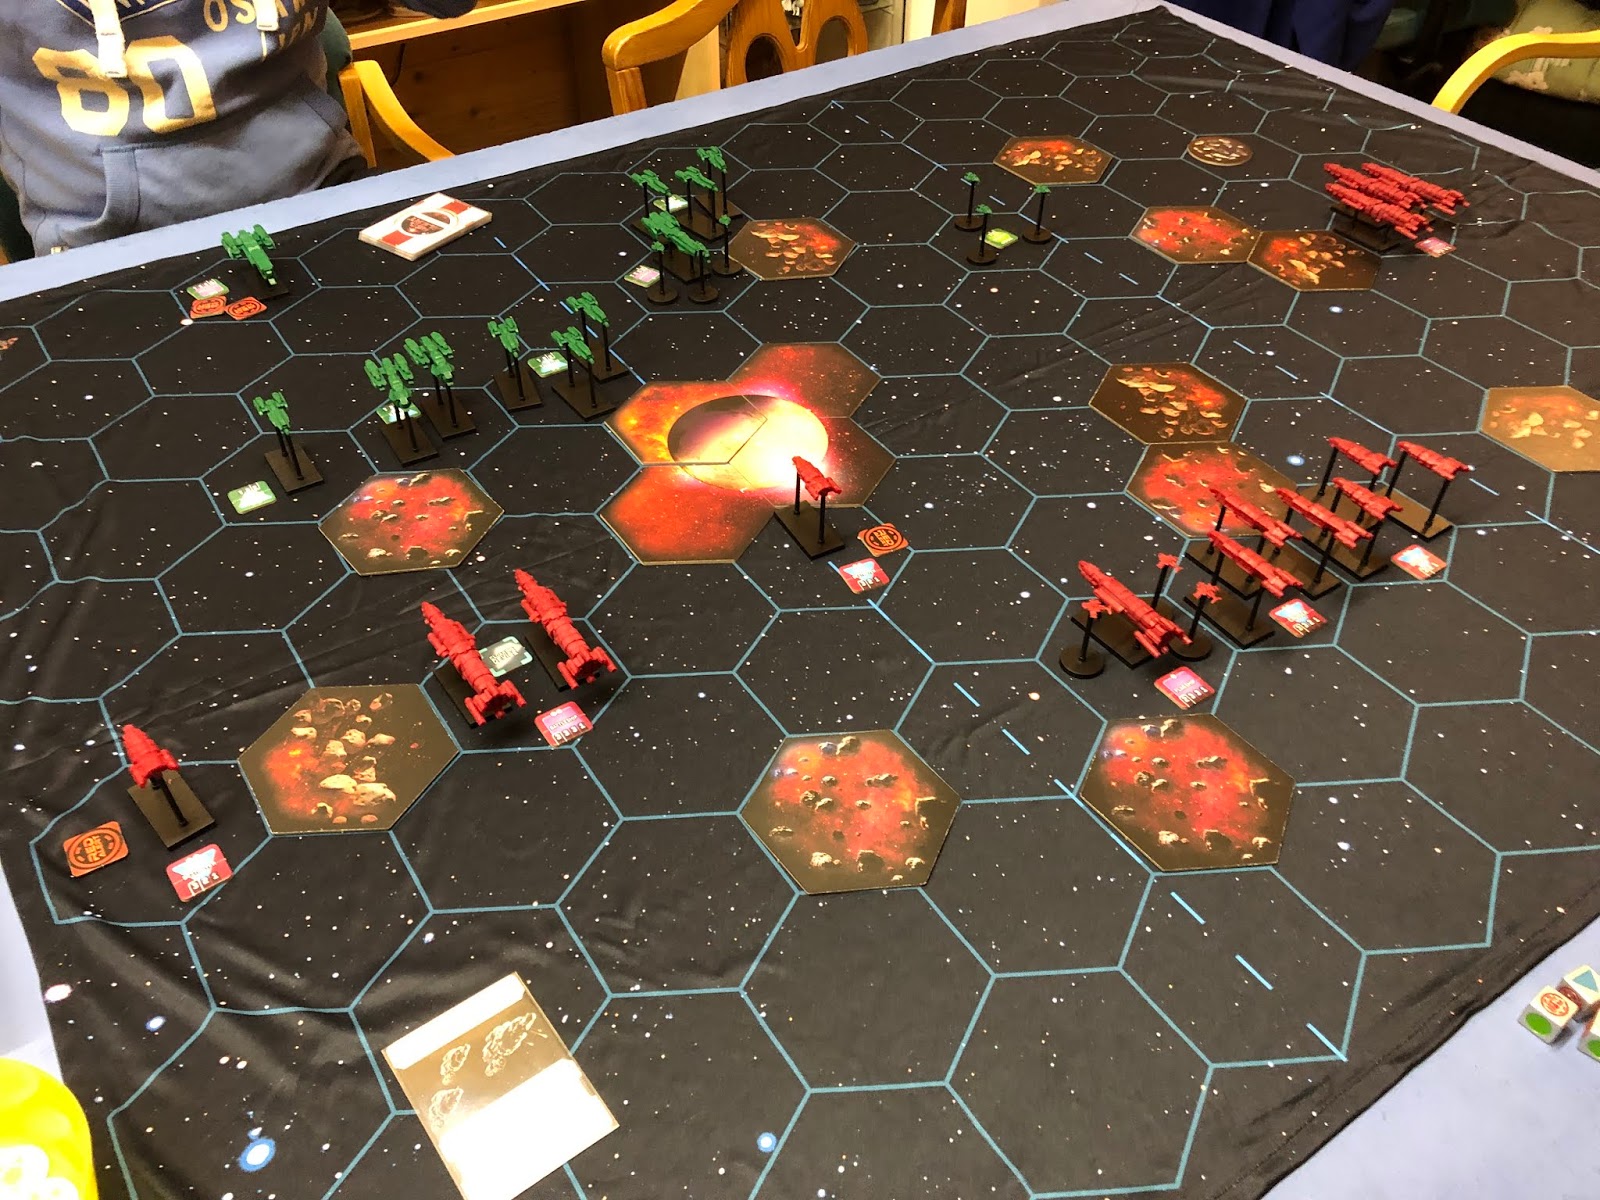
And so it was the day after the unboxing, Roo and I set up the first scenario "Uneasy Truce" with Roo taking command of the Rebel Confederation fleet and I took the helm of the lawful rulers of the Galaxy, the Commonwealth.
The upholders of law and order in the Galaxy, the Commonwealth Fleet.
Looking to overthrow the oppressive yoke of tyranny, the Confederation fleet.
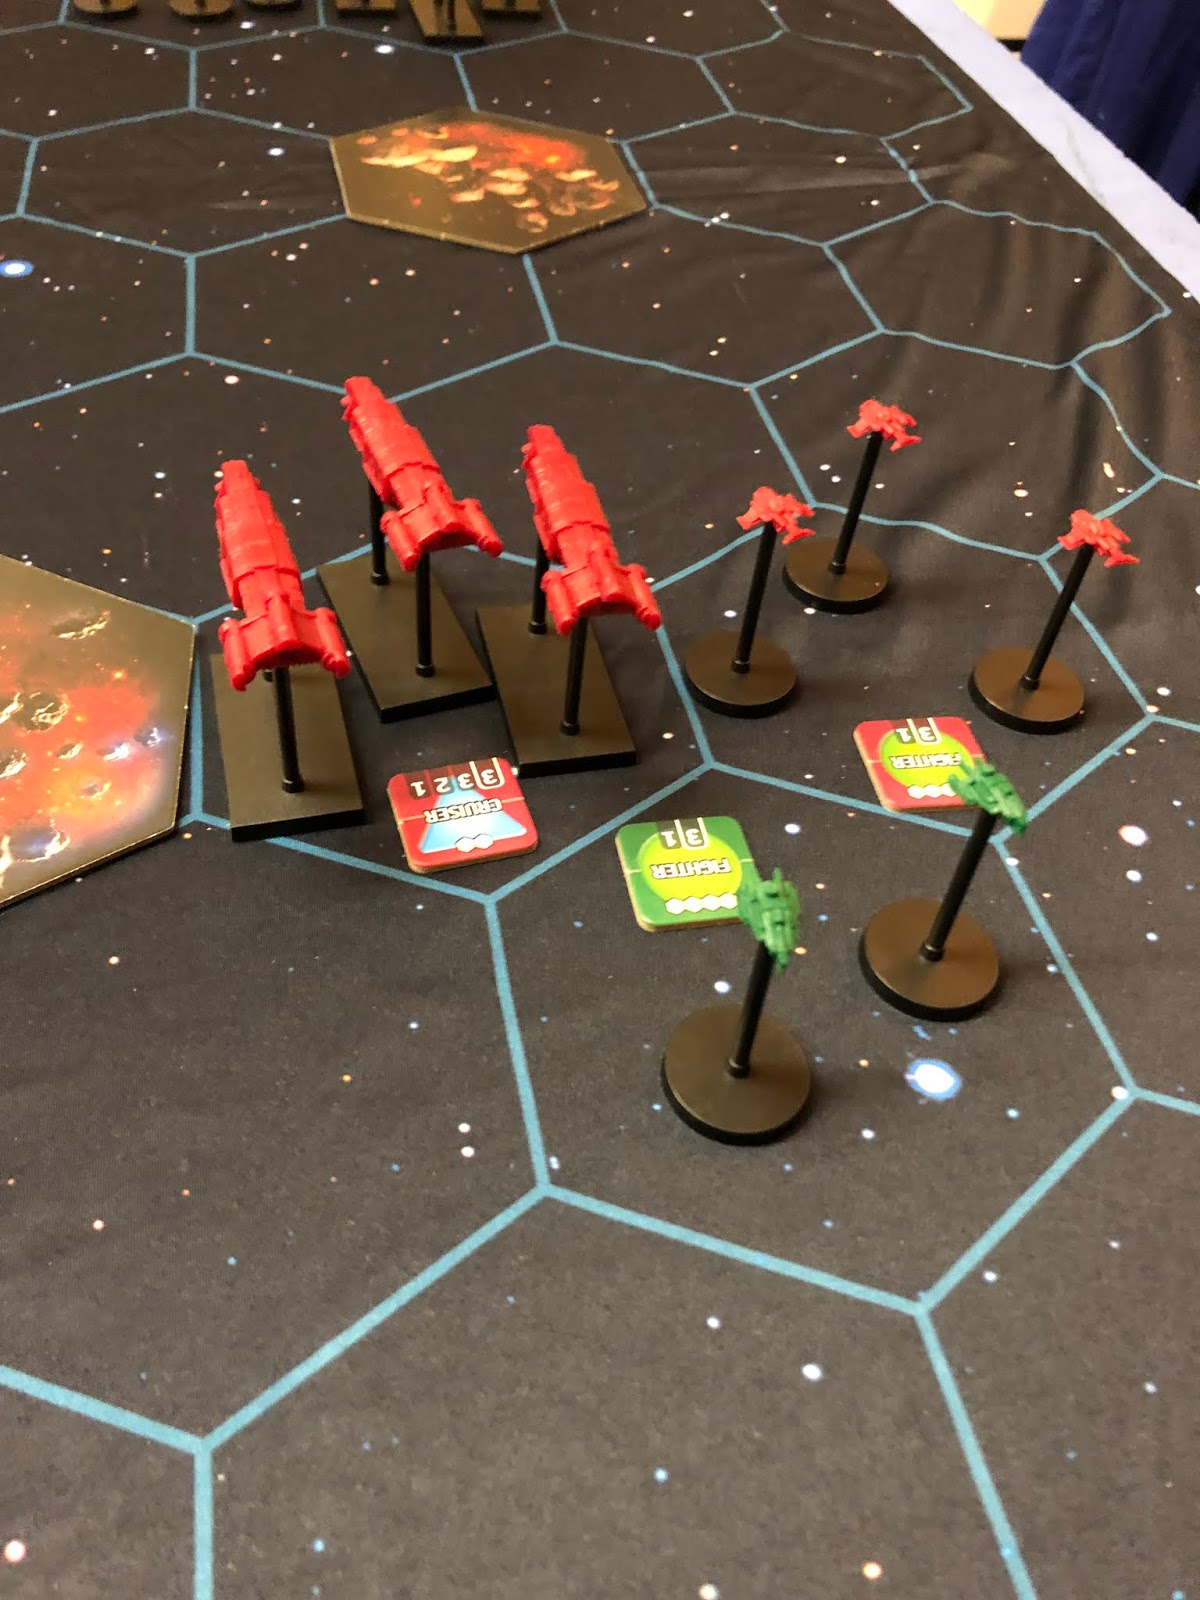
The Counter in the hex is the unit counter which contains all the info you need about the unit, it's class, movement, range and number of attack dice to roll.
To win the scenario, a player had to obtain 13 victory points. Roo took the first turn and immediately went on the offensive by playing "Move, Combat, Move"
On the Confederation left flank, the two Confederation fighter squadrons gang up on the Commonwealth fighters.
And the fighters engage on the Confederation right flank.
First Roll of the game......
A Blast Symbol, a Red Alert and a miss on the fighters. One fighter model removed and the Red Alert forces a retreat.
On my turn I play the outflanked card and moved my big ships to swat the annoying Confederation fighters out of space.
Commonwealth Left Flank - the Cruisers open fire on the marauding Confederation Fighters
And on the right flank some damage is scored.
Roo then ordered an advance across all sectors -
And played a sneaky Combat Card to remove all but 1 of my Combat Cards from my hand -
Note in the top left of the card, the 2 "Star token" cost to play this card.
Confederation Battleships with their Destroyer Escort move into range of the Commonwealth forces.
Confederation Fighters fire once more in their Commonwealth counterparts. Ouch! Scratch one Fighter Squadron
The Red Alert token - all that is left of the Commonwealth Fighters.
After 3 turns, the fighter squadrons of each fleet had taken a bit of a pummeling but the Commonwealth have also lost a Cruiser Squadron.
The opposing Battleship squadrons look to get Space dominance over the other but in the ensuing salvoes, accurate Commonwealth fire reduced the Confederation heavies to space dust (that was one thing we did forget about - when a capital ship squadron is destroyed it is replaced by a space debris token which makes that hex impassable terrain).
The Confederation have total control over their Left sector but are heavily outnumbered in the Centre and Right Sectors.
The Commonwealth Flagship senses victory - if that Confederate Cruiser squadron can be taken out it would give the Commonwealth enough victory points for the win.
14 Victory points to the Commonwealth. Victory is theirs!!
The game only took about an hour to play which wasn't too bad for our first attempt so we quickly set up the mat for the second scenario "Declaration of War"
The sneaky Confederation using the cover of the Planet to protect their fleet.
Once again Roo, went first. This time the winner would be the first to 18 victory points or by destroying 8 enemy units.
Roo sent his fighters in to harass the Commonwealth forces -
The battered Commonwealth fighter squadron sent packing to the rear. Worse, however, was to come -
The Confederation fighters swoop on to the Commonwealth Cruisers.
3 hits! One Cruiser squadron vapourised!.
On the Commonwealth Left Sector the Destroyers move to engage.
Then the Commonwealth Fighters get their own opportunity to do a hit and run on the Confederation and claim some badly needed Start Tokens.
On the Confederation Left Sector, the battleship squadron senses an easy kill on the fighter squadrons. However, this took them within striking Range of one of the Commonwealth battleship squadrons and by playing the "Echelon Right" Command Card, the battleships moved in to position and opened fire.
The Confederation Battleship squadron is no more - 6 victory points to the Commonwealth.
I started to sense that the battle was starting to swing my way. I had a good set of Command and Combat cards in my hand and when I played Counter-Attack
My Destroyer Squadron moved into point blank range of the Confederation Battleships. A Combat Card gave them an extra combat dice and they opened fire.
2 hits scored and if it hadn't been for the fact that the Battleship can ignore 1 blast symbol where the attacking ship is a Strike class unit (as was the case with the Destroyer unit) it would have been another Confederation Battleship squadron destroyed.
The damaged Confederation Battleship squadron skulks in the rear whilst the Commonwealth Battleships move up to challenge control of the Planet
The Confederation forces greatly reduced seek cover once again behind the planet
By this stage of the game, both sets of Fighters had been taken out of action with only those fighters that provided CAP support for the Flagship remaining.
By now, the Commonwealth Battleships had revealed their new secret weapon
The Cloaking Device (obtained by play of a Combat Card) reduces the number of attack dice the enemy can roll against the unit to 1, regardless of range.
The Confederation Battleship squadron returns to the line and in their salvo score another hit on the Commonwealth battleships.
However, in my turn, I am able to activate my Battleship Squadron and opening fire on the battleship squadron-
Two hits destroys the Confederation battleship squadron and with it gave me the 18 victory points required for victory.
So an enjoyable night's gaming with a new game but one familiar to us both having played Commands and Colors before.
The play of the Command Cards are key to the game - if you don't have the right cards in hand then this can really thwart your plans. I have read some reviews of Commands and Colors games where this is regarded as a weakness of the game system, but I would regard it more akin to "friction" in the game (a'la Too Fat Lardies design philosophy) in that you are not always able to do everything that you would want to do in a turn.
The Combat Cards add unexpected twists and flavour to the play and can help get crucial extra dice into a combat. The Combat procedures is itself simple to pick up and effective (and sometimes brutal as shown in the case of my cruiser squadron who were blown apart in one die roll) Again, some people have said about Commands and Colors Ancient, (where the combat system is similar) that the fact that a unit does not lose attack strength despite the casualties taken is not realistic (as far as there can be any realism in such games). I, personally, haven't got a problem with it.The number of models left in the unit is certainly a helpful reminder as to it's status and by maintaining the same attack dice regardless of whether there is 3 models or 1 model in the unit it is an easy way to remember how many dice to roll.
Although we missed a couple of things (Capital Ship Debris being one of them) and not pursing with Destroyers squadrons (this would have required star tokens and for the destroyer to have just engaged in a close quarters combat), I think we both picked up the rules pretty quickly.
There was one combat card which made us stop and think about it's meaning - "First Strike" which allowed the Defender to strike first in a combat. It wasn't clear from the card if this would have required to spend Star Tokens to carry out, as it's effectively a "battle back" but where the defender has preempted the strike and struck first. We treated the card to mean that it did require the defender to have star tokens (2) to be able strike first but other than that the cards were pretty clear and unambiguous.
The models, as mentioned in my previous post, are functional enough. I am debating whether to paint them as they look as of they will take paint well enough. With the Kickstarter came some extras of the Core Set ships so I might experiment with some of those. Some of the models are slightly out of line but nothing a dip in to hot water wouldn't sort out.
So yes, very pleased with the game and I'm pretty sure that Roo and I will be playing the next scenario pretty soon.
.