Way back in May last year I ordered the 1/72nd Scale Panzer IV kit from The Plastic Soldier Company Ltd with a the intention of reviewing it for the eager WW2 wargamers out there.

The kit duly arrived and although there are parts to build 4 different versions, I decided to build up the first model as the Ausf H version, because I think the Schurzen plates looked cool.
Then I suffered the "Great Hiatus" and stopped blogging and stopped building Panzer IV's.
But, now I'm back and so better than late than never as they say, here are my thoughts on the kit.
The kit allows you to build 3 models and as already mentioned the kit provides you with parts to build 4 different versions of the Panzer IV.
So you get 3 sets of sprues looking like this -

And a 2 sided instruction sheet

Showing the generic parts that are used in all versions

And some colour coding help you identify which parts go with which version.
So first the tracks got built

Notice the circular mould marks on the underside of the track. Not a problem when building the "H" version because of the Schurzen skirts but might cause some displeasure to those modellers looking for nice clean parts.
Then the chassis


So far, so good, the parts fitted cleanly without too much fuss. So then the turret was built and the first of the distinct changes to reflect the version I was building, the long barrelled 75mm gun

I drilled through the muzzle - probably should have done it before I fitted the gun though
However, the turret also gave me my first obstacle. The turret has 2 side hatches. There are indentations moulded on each side on to which you stick the hatch doors


Ah good, thought I, the different hatches are moulded slightly differently thus making it easy to identify which hatch door fitted on which side. Yeah well, it didn't quite work out that way as on the kit I received (and presumably the same for the other kits) the moulded hatch doors didn't fit, or at least 1 did but the other didn't and I tried all the different combinations. Eventually I just had to trim away at the hatch door until it fitted snugly into the slot.
It was then I discovered this bit

Obviously some sort of storage box but no hint as to where it was to go on the model.
Then there was this bit

According to the instruction sheet it is fitted to the Ausf H

Green means "H"
But I initially couldn't see where it went. Eventually I found from checking some pics on the web that it looked to be fitted to the right hand side of the upper chassis so that's where I stuck it. And actually if you strain your eyes you can just see it on the picture of the Ausf H on the instruction sheet

A couple of options for the commander

The air bubbles in the back are easily filled in
Then on pop the Schurzen

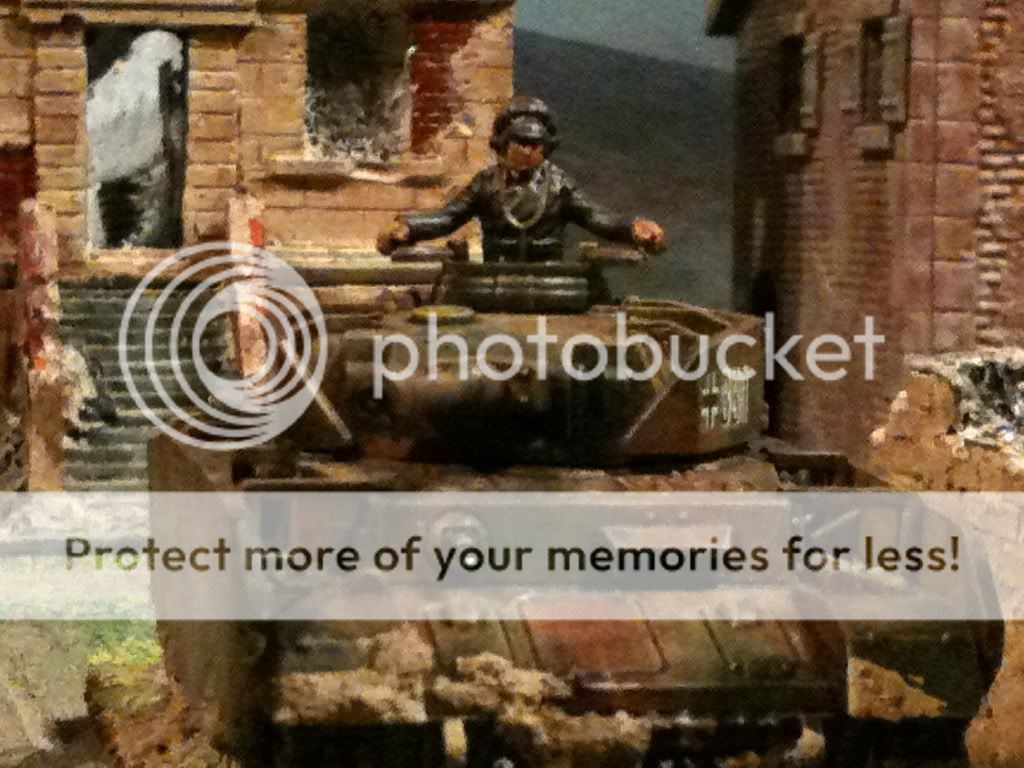
That was as far as I got at the time so over the last few weeks I finally managed to finish the model off.

I used Vallejo's Flames of War colours for the vehicle. - Middlestone 882 for the base colour and Reflective Green 890 and Cavalry Brown 982 for the camouflage pattern, covered it in GordonY's gunk (Gordon's home made Army Painter substitute) slapped some Skytrex decals on it and then sprayed it with Anti-Shine from Army Painter

Actually, the decals have been a bit of let down. They were too fiddly to trim precisely and when I used them before they just fell off, so this time I put them on before I sprayed the vehicle with the Anti-Shine thinking that would help keep them in place but all it seems to have done is highlight the film

I then slapped the tank on a cork base - I swithered about whether or not to base it, but decided I didn't want to risk having to re-attach the Schurzen every time I picked the tank up, so went for the base to cut down on the handling of the model. Covered the base with some Brown Basetex from Coritani (and slapped some of that on the tank as well) and some static grass.


Verdict? - nice simple kit. It might lack the detail that some modellers will prefer to see on a kit but what it lacks in detail it makes up in price - £12.95 for 3 models can't be bad.
So, the 1/72nd M4A1 Shermans are now on order and I'll let you know what I think of those when they arrive and I promise not to take 10 months before getting round to it..........

Nice review KP,
ReplyDeletei've built far to many PzIV's to count over the years. 1 of my favourite vehicles of WW2.
Sounds like a great buy for wargamers, 3 for just under £13 bargain!!
Cheers
Paul
Great review and some good skills in construction and painting. Well done.
ReplyDeleteGreat Review I have just put together Tiger 1 1.35 scale which I will put on my blog soon great paint job you have done
ReplyDeleteGreat Dave. The T34's are good too. I have yet to paint them and good value for the price.
ReplyDeletenice review,and your painting's good on this one.
ReplyDeleteEven though I don't do 15mm, I want to rush out and buy a kit to build it. Curse you!!!
ReplyDeleteNicely done, good explanation and as you said not bad for the price or for wargaming with.....
ReplyDeleteGreat review!!!! And a very nice looking end product!!!
ReplyDeleteVery nice review! And the outcome is awesome!
ReplyDeleteGreetings
Peter
http://peterscave.blogspot.com/
Thanks for posting such a thorough review. These have been on the 'to buy' list for a while, so it's useful to see how others have got on with them. The final result looks excellent!
ReplyDeleteLooks very good. Odd that the instructions are a bit inexact.
ReplyDeleteCheers
paul
Thanks for all the comments guys. It is a nice and relatively simple kit to build despite the query about the mystery bits.
ReplyDeleteOn TMP one of the comments there is about fitting the Commander's hatch in the closed position so I will need to check that out
Nice review. I also had a bit of a problem with one of the turret side doors, so it looks like an error of the moulding process.
ReplyDeleteThe mysterious stowage bin should be placed on the same spot as the ausf. H air filters. It took me a while and lots of googling to work out.
Thanks Laffe!
ReplyDeleteVery nice. What can you do with this miniature? Let it get dusty on a shelve? No, play with it with http://panzercombat.sourceforge.net Panzer Combat II.
ReplyDeletePanzer Combat II
DeleteThanks
ReplyDeleteI have a box of these to make too
The walk through was a great help
Cheers Geordie. Alas the other 2 models are still languishing in their box. But now that my copy of Battlegroup Overload has landed with a large thump on my door mat, that just might be the encouragement I need to get them built.
Delete