Showing posts with label World war 2. Show all posts

Thursday, 14 March 2019

Bolt Action - Somewhere in the Western Desert


The scene was set for another run through of the Bolt Action rules for Roo's benefit. An 8th Army v D.A.K clash (sticking to my preference to fight with historically comparable armies) we were playing this time the "Surrounded" scenario from the main rule book (number 11). 

As the 8th Army player I decided to be the defender which required half of my available units to be set up in the centre of the table, in this case they would deploy in the village and try and hold their positions until relieved.


I  must really iron out the creases in that mat

It was only after deploying the units in the village that I realised that I had already made a number of mistakes. Firstly, in this scenario the attacker gets to try and call in a preparatory bombardment, something that the Brits have an advantage in that they get to roll twice on the table and pick the best result. Secondly I realised that I didn't have a MMG team in my list so that had to be removed and replaced with the light mortar team. Finally, Roo, as the attacker would have to launch his first wave of troops from his table edge. I had misread the scenario special rule which said that after the attackers' first turn any other unit can come in from any table edge (provided an enemy unit had not come in from that table edge that turn). Accordingly I had set up my 6lb anti tank gun facing my table edge thinking Roo would be sneaky and try and come on that edge with his Panzer III, but no Roo had read the rule properly and so the Panzer III was duly deployed on his table edge on the opposite side of the village from where the AT gun was deployed.

Roo called in his preparatory bombardment and scored pins on every unit in the village.


Battle then commenced, with the aforementioned Panzer III coming on to the battlefield and with a hail of machine gun fire killed one member of the light mortar team.


However, the early appearance of the Panzer meant that when I decided to bring on my M3 Lee tank there was only one place for it to go -

However, my point blank range shot, on the rear of the Panzer with both my main gun and the turret gun were spectacularly unsuccessful.

And of course, having brought my tank on it was an easy choose for where Roo would deploy his anti- tank rifle team, with inevitable results: -

Didn't even get a chance to roll to see if the tank was vunerable to fire - a straight up kill by the AT rifle team - boo!!

At least the artillery strike brought in by the British Artillery Observer had some succes scoring several pins and taking out the German Mortar team -


The gallant defenders of the village bravely repelling the forces of tyranny!

Despite the randomness of the dice draw and the scenario rule that let you deploy reserves from any table edge both Roo and I failed to grasp the reality that deploying too close to a corner would lead to trouble as shown by the Lee v AT rifle situation above and then in the other corner of the battlefield, Roo having brought his AT gun on from one table edge near the corner, I brought on my CO and an Infantry section from the perpendicular table edge -

The scene just before the AT gun crew were mown down by the point blank fire of the Desert Rats.

Meanwhile, I had brought my AT rifle team on to the battlefield in the hope of doing the same to Panzer as Roo's AT rifle team had done to the Lee. However, in a very unsporting fashion, Roo decided to face the AT rifle team head on with his Panzer -


Unfortunately the shrubbery was inadequate at providing cover to the AT rifle team who were quickly dispatched by the Panzer.

Back in the centre of the battlefield a fierce firefight was developing between one of the Desert Rats infantry sections in the village and the bulk of the D.A.K Infantry who were taking cover in the shallow gully -


A FUBAR result forced one of the German squads to run back to the table edge -


Not to be outdone, my sniper team which had now entered the battlefield, instead of trying to target the D.A.K AT rifle team, FUBAR'd and ending up taking out the remaining member of the Desert Rats light mortar team in a "friendly fire" incident -


With game time running out the Desert Rats decide to concentrate their fire from the Western side of the village.

After several attempts to bring it on from reserve, the Puma armoured car finally made it's appearance  -


A combination of poor dice rolling by Roo and good saving throws by me, meant the infantry section were not destroyed so that in the next turn they took the battle to the enemy -

4 hits scored on the Puma, a roll for damage and scratch one Puma

However, this shouldn't really have happened as I had forgotten and Roo didn't know that the Puma has the "Recce" special rule and as such could have evaded away from the assaulting infantry. Ah weel, we'll remember the next time.

The Panzer looking for it's sniper team pray. In fact it might as well have let him be as the only thing the sniper team hit all night was his own mortar team!

The Panzer finally breaches the village defences -

But it was not enough to secure a victory.

Scene at the end of the battle.

As both sides had lost 4 units each giving 4 VP's each, under the scenario rules the game was declared a draw (although with the faux pas over the "Recce" rule Roo, technically would only have lost 3 units, but victory was only claimed if you had scored 2 or more VP's than the opponent so it didn't make a big difference in the end.

So another enjoyable game. Roo is cracking on painting up his Finns. I'm debating whether to borrow Kev's Russian forces to go up against them or to go down the slippery slope of getting my own. He may be a wee while getting the Finns painted so I have a bit of time to decide on that one!!




Sunday, 24 February 2019

A Return to Squad Leader


One day a long, long, long time ago in a wee flat many miles away from Kingsleypark Manor, (Dundee's Hilltown to be exact) I should have been up to my ears with law books studying for my degree exams. But instead, I had been invited by Robert an on/off member of the Dundee University Wargames and Role Playing society to play a game that I had read about many times but had never yet seen in real life - "Squad Leader - The Game of Infantry Combat in WW2"

Robert brought out of his cupboard the orange and black box, with the sinister looking SS officer on the cover and on opening the box there were dozens of plastic baggies filled with 100's of counters, a fairly meaty looking rule book and 4 geomorphic hex boards.

One of the real innovations of Squad Leader was the "programmed instructions" layout of the rulebook. You only needed to read a certain number of rules to play the first scenario and once you were familiar with those you would read the next rules section in order to play the second scenario and so on. 

The base game was subsequently expanded with the release of the Cross of Iron, Crescendo of Doom and G.I. Anvil of Victory modules and as it happened Robert had all those modules too.
No, this is not a picture of the inside of Robert's cupboard but a picture of the Squad Leader shelf in the Cabin.

So we set to it and played through the first few scenarios and being the impatient gamers that we were, we were soon jumping through the scenarios introducing tanks, flame-throwers, cavalry and even a scenario where German motor-cycle side car riders were trying to capture the Dutch Royal Family (scenario 26 "Assault on a Queen" from the Crescendo of Doom module, if you are interested). Needless to say, I didn't get any studying done that day and so I was hooked and set about getting my own copies (which as you can see above, I managed to do).

Problem was, after finishing Uni the availability of opponents dried up and so for a few years the boxes stayed in the bottom of my cupboard. A move back to Brechin (my original home town) and I did get some games in against my bro but even those games stopped after a while so it must be over 25 years since I last played. 

G.I. Anvil of Victory was the last of the Squad Leader modules to be released. The fabled Pacific War supplement never appeared (although The Wargamer magazine (issue 30) did publish "Blood & Sand" which provided maps and scenarios for some Pacific Battles). Instead, Avalon Hill released "Up Front - The Squad Leader Card Game", a game that I had, played once and sold it and the Banzai expansion module a few years back for much gold. 

And then Avalon Hill released "Advanced Squad Leader". ASL, as it's known, effectively ended any further Squad Leader modules being released and has gone to become a hugely popular, game though with very detailed, micro managed rules. It is now a game series which according to Boardgamegeek now has 428 expansions! I have played a couple of scenarios from the ASL Starter Kit 1 but I found the whole thing too intimidating to invest in.

No. 2 son, Roo (not his birth name but that's what he likes to call himself) had been looking at my games shelf during the holidays last year and was making noises about trying some of those "hex and counter" games. We managed to get a game of Arnhem played (my very first hex and counter game as told about here (which lead me to buy another copy of the game for Roo to keep for himself) but between one thing and another we didn't get another hex and counter game played. Until last week.....

Having looked at the Squad Leader rule book and being unencumbered with rehearsals and the like, Roo announced that he would really like to give the game a go. So it was, that we set up the pieces for the first scenario - "The Guards Counterattack".

The objective of the scenario was for the Soviets (Roo) to capture 2 or more of the stone buildings initially occupied by the Germans (me) OR have a favourable 3:1 ratio of unbroken squads at the end of the scenario, which was to last 5 turns.

Roo wasted no time in opening fire with the 3 stacks of squads situated in the building in the top left corner of the board -
Ouch!

Whilst primarily an "IGO-UGO" system there is opportunity for defensive fire to take place during the opponent's turn. It is also pretty devastating being caught out in the open so when Roo attempted to move Colonel Berki and his 3 squads into hex E5 with the intention of forcing the Germans to retreat out of that building he hadn't realised he was in the line of fire of the German stack located in the large stone building in the middle of the board and with admittedly a very good roll on my part, the inevitable happened -
The late Colonel Berki 

The German turn saw the broken squads rally and in their "Prep Fire" phase cause more casualties to the Soviets so that at the end of the first turn the board looked like this -
The red counter are Soviet Squads which have gone "Berserk" as a result of rolling a "2" when testing morale. This means that they ignore all further morale checks but have to move towards the nearest enemy unit to engage them in close combat.

The casualty count at the start of turn 2

The Soviets pushed on to try and take the German held building on the left hand side of the board. Moving in to an adjacent hex to enemy units is always risky even with the benefit of cover but it didn't help the German cause when this happened -
The dreaded "box cars" result meaning that the 2 light machine guns in Sergeant Kelso's stack suffered a breakdown - not helpful when facing a possible close combat

Scene at the end of Turn 2 -

Turn 3 saw the Soviets assault Sergeant Kelso's hex but the combat was inconclusive and saw the two sides locked in combat. In the defensive fire phase the Germans saw matters swing to their advantage when the 2 stacks in the bottom right of the board opened fire on the Soviet squads in the building before them -
"Snake Eyes!" A welcome sight when you are the firing player.

The close combat in Sergeant Kelso's hex saw the 2 sides annihilating each other (close combat is very bloody if the rolls come off) so at the end of turn 3 the board looked like this -
Sergeant Kelso has fallen but now the Germans have advanced and are occupying one of the Soviet buildings, not good news for the Soviets!

The Casualty tally at the end of German turn 3

As the name of the game implies, Squad Leaders are key. If a squad breaks as a result of a failed morale check then only a Squad Leader can bring them back. At the start of turn 4, the Soviets only had one squad leader left and with a number of broken squads on the board, Roo felt he had to get that leader, Lieutenant Dubovich, to help those squads but again having to move into the open had predictable results and Lieutenant Dubovich, fell in a hail of bullets. With no way of bringing their broken squads back, victory was slipping away from the Soviets.

End of German Turn 4. The Soviets are running out of unbroken squads although they did have some success in capturing a German Heavy Machine Gun.

Casualty list at the start of Turn 5

With no hope of being able to achieve the victory condition, Roo took some comfort in trying to inflict some more casualties on the Germans and another German squad was KIA'd but it was too little, too late.

The board at the end of the game.

The casualty list.

Combat in Squad Leader can be extremely brutal. Cover is key and you have to protect your squad leaders otherwise your force will be eroded away too quickly as your squads fail their morale tests and can't recover. That may be one of the weaknesses of the game in that so much depends on the squad leader. I don't know if the rules in the later modules do anything about that - we'll have to keep playing to find out!!


Sunday, 17 February 2019

Char B1 BIS by Warlord Games


Sometime ago, in a moment of impulse, I picked up a sizeable Early World War 2 German force in 28mm. Now in fairness to me, it wasn't quite an impulse buy as I knew TOOFAT Lardies were releasing their Blitzkreig 1940 supplement for their Chain of Command rules so to me it made sense to pick the Jerries up.

Until it then dawned on me that I didn't have any opposition for them.

So the Jerries have stayed in their carry case since their arrival, waiting for a worthy foe. However, hope was on the horizon as Christmas was coming up and a good selection of wargaming goodies can usually be expected to be delivered, so no better time than to decide on what army to ask Santa to bring.

Now those of you have read any of my previous ramblings will have surmised that my preferred go to army are the Brits, having forces, in 10mm, 20mm and 28mm, so you may have thought that I would have gone for a BEF force. Certainly that was my initial thought but, as usual, fate intervened and it was about this time that Warlord Games released their Battle of France for campaign supplement for Bolt Action and also released some new figures for their French forces along with a couple of army deals

So a quick note to Santa up the chimney (you all do that don't you?) and on the big day a whiff of garlic could be perceived coming from under the Christmas Tree...

So where to start? Well with the tank of course!

The Char B1-Bis had entered service with the French Army around 1936, replacing the Char B1, of which only a handful had been built. The newer model had increased armour and a more powerful engine. The hull of the tank was formed of cast sections, bolted together. The driver sat in the left of the hull and to his right was the fixed traverse 75mm cannon, which the driver operated. The turret was armed with a 47mm cannon and a 7.5mm machine gun. Another 7.5mm machine gun was located in the hull. The tank had a crew of 4 with a loader, wireless operator and commander in addition to the driver. The design, however, did suffer from a common flaw in French Tank design of the time in that it had a one man turret meaning the commander had to not only command the tank but load and fire the turret weaponry as well. 

The B1-Bis was heavily armoured and when the invasion of France began, the tank could withstand  fire from most of the German anti-tank weaponry of the time, with the exception of the 88mm flak gun, which the Germans also used in the anti-tank role. However, the tank was slow and the German Blitzkrieg tactics did expose this lack of manoeuvrability. It did impress the Germans enough, however, that after the surrender of the French forces the Germans made use of an number of the remaining B1-Bis, with some being converted into flamethrowers, the B1-Bis (Flamm). But I wasn't interested in such turncoat conversions, I needed the tank to support the brave infanterie resist the Boche.

So what's in the box?

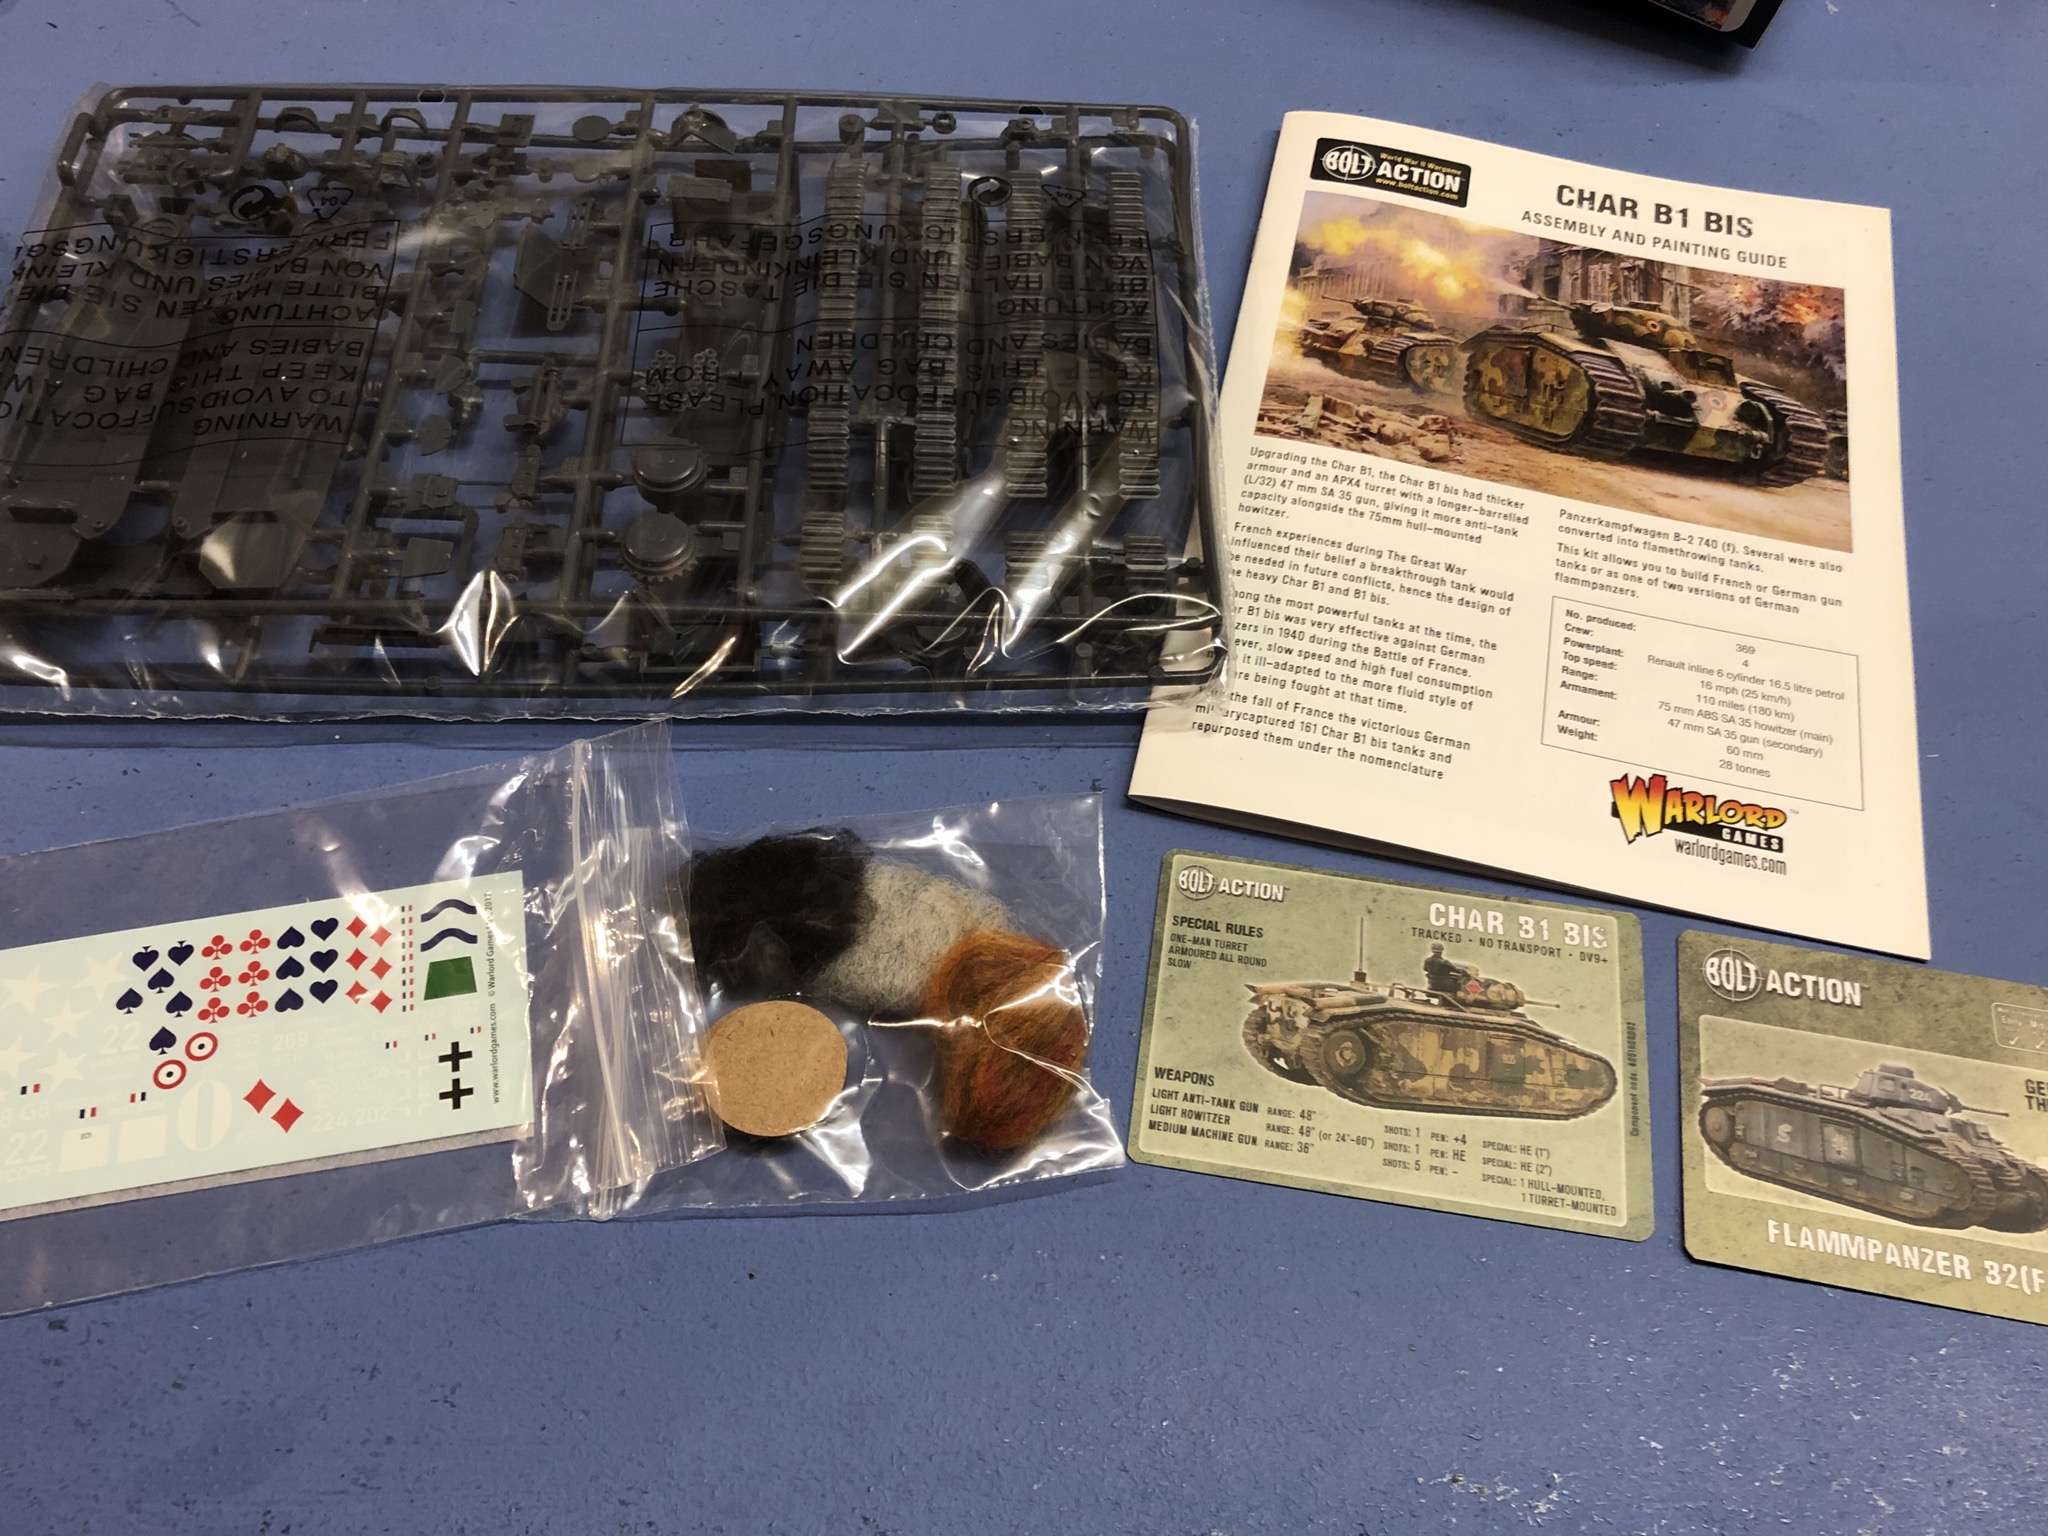
An instruction booklet, two plastic frames of parts, a decal sheet, some data cards for Bolt Action rules and some damage markers (are they trying to tell me something?).

Some helpful advice


First up, the track assembly. Now I'm a lazy model maker but I'm also an impatient model maker as well and unless I take time to check the parts over and do a dry run then disaster has been known to happen when I find out I've stuck the wrong bits together. So it was helpful to see little helpful things like -
The hole in the sprocket wheel is shaped so that the inserted peg can only fit one way.

Helpful inserts for the track pieces to connect in to.

Track piece with the corresponding connector pegs

The completed track assemblies.

On to the next page!

As I was building the French version, there were only a couple of drill holes I need to make on the hull. The main gun assembly went together pretty easily.

Now to join the track assemblies to the hull. Again some helpful little connectors to make it obvious where the pieces are supposed to fit together -


Now starting to look like a tank


The next section - a number of options here depending on the model you are making - the French version is on the top of the page. Note for the German options the part numbered "56".


Now the turret and the commander!

The French Commander showing you need hands

The turret hatch door shown open or closed. However, there is a wee typo - the opened version should be numbered "58". Also note the parts numbered "4" - these are little hooks (grab handles?). Anyway they are tiny and the first one typically pinged off in to the ether when attempting to glue it on.


The finished model!


A fairly straightforward kit. Warlord used to make the kit in resin and I'm not a great fan of resin models so it was certainly much better in my mind being a plastic kit. Just a couple of fiddly bits during the build - making sure the top and bottom parts of the hull joined together without leaving a gap, the chain hanging off the back of the tank - make sure you give the hooks that it hangs from plenty of time to glue in to place and, those damned fiddly hooks on the turret.

I've also picked a model of the Somua S-35. It's a resin model though so I think I will try painting up some of the infantry first before I try tackling that.